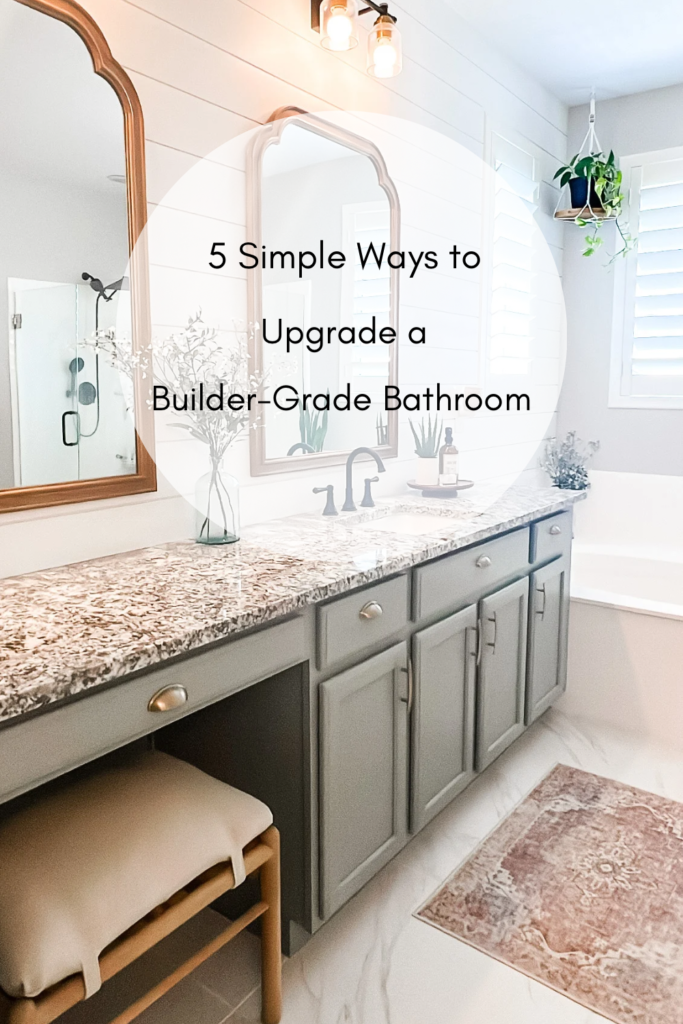
5 Ways to Upgrade a Builder Grade Bathroom
I’m so happy you’re here and excited to share with you how we upgraded our builder-grade Primary Bathroom to a more custom feel!
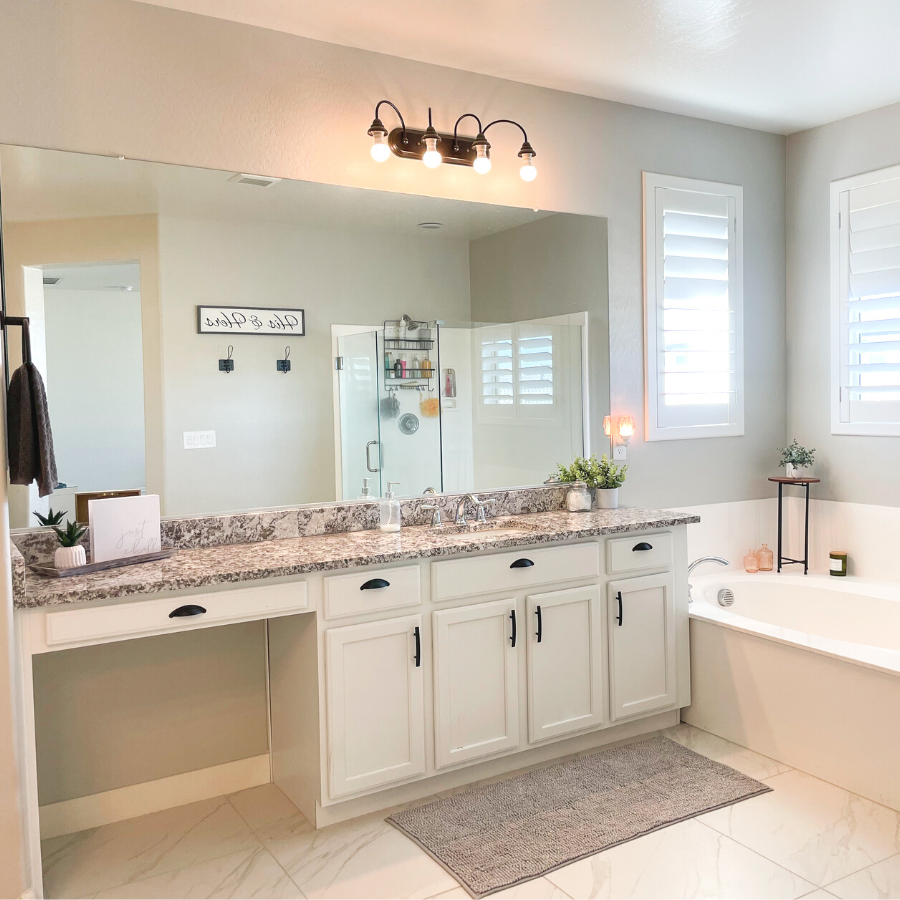
We were able to give our Primary Bath a glam up with 5 easy changes.
I’ll share with you what materials we used and where we purchased them.
Anytime we do a DIY project I’m always looking for the most affordable products. Some items I will splurge on depending on what the item is.
If I find an item that I like I will always look around for a better price before I buy it. So, you can know that whatever products I’m sharing I’ve already done the research for you!
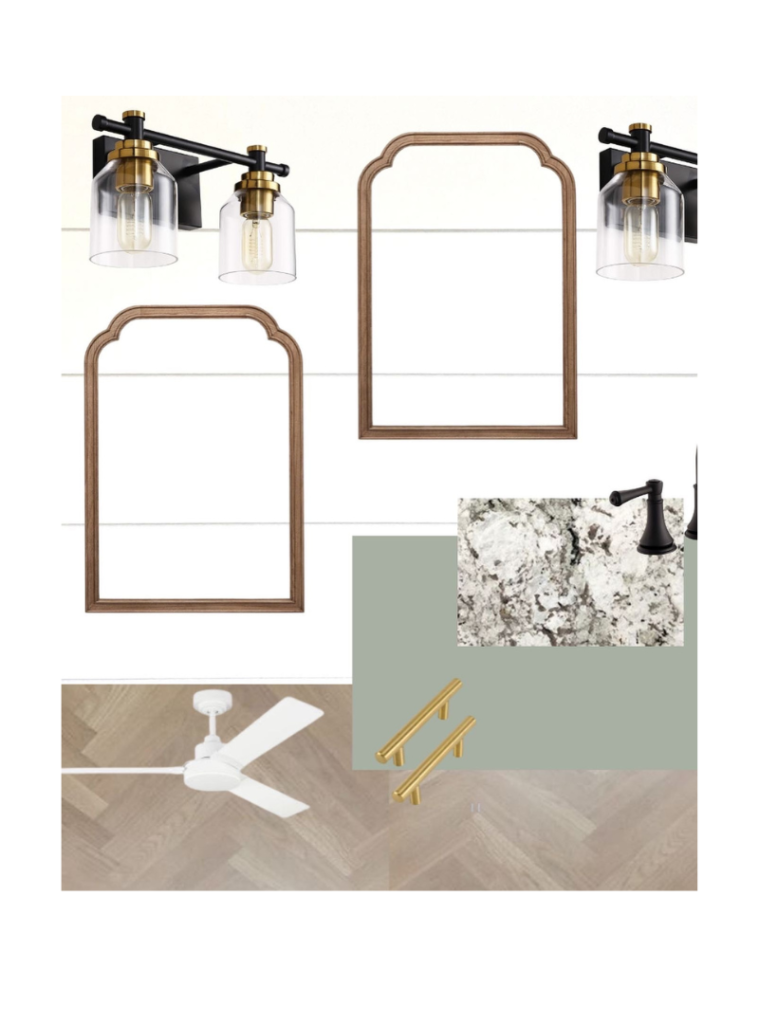
Primary Bathroom Mood Board
When I’m designing a room I always like to create a mood board. It helps with visualizing what the space will look like, brings your ideas together, and helps you see if the items will be cohesive together.
You can create a mood board in a few different apps. Canva is my favorite design tool and I prefer to use it on a desktop (you have more options).
This blog post contains affiliate links. This helps maintain and keep this blog running. If you have any questions, feel free to read my disclosures. Thank you!
5 Easy Changes to Upgrade Your Primary Bathroom
- Remove builder-grade mirror -Add framed Mirrors
- Update faucets
- Change lighting
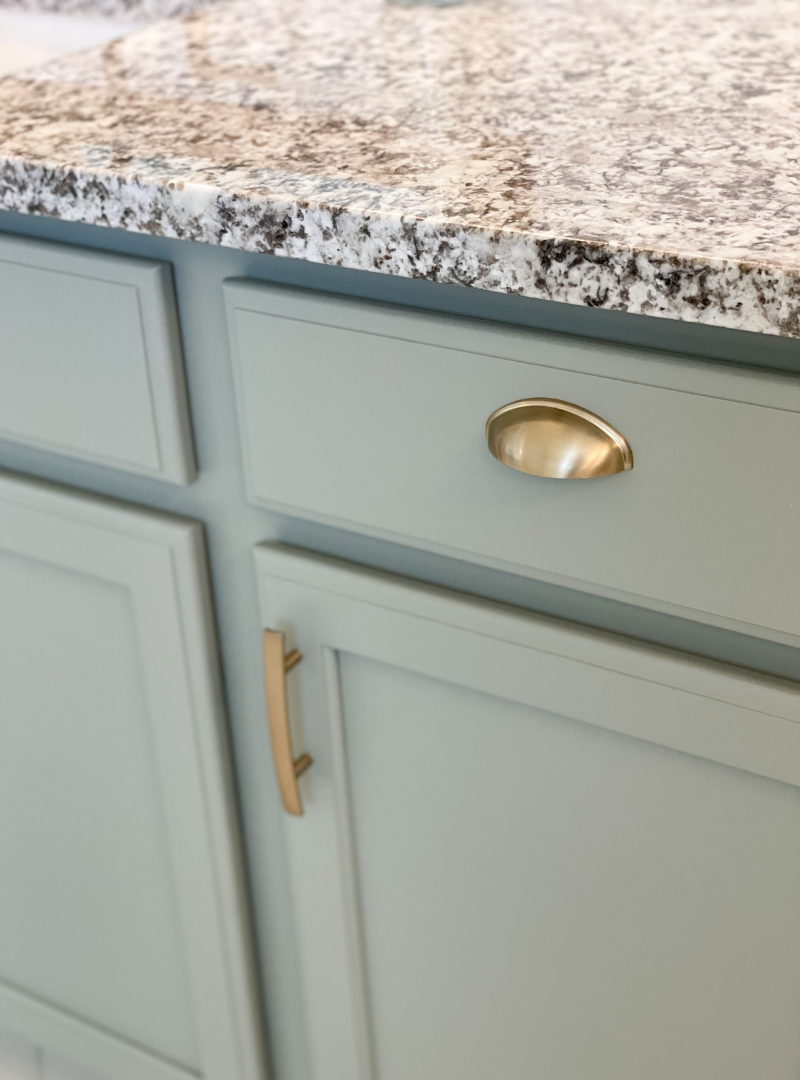
- Paint cabinets & add new hardware
- Paint, and or add accent wall/walls with wallpaper, shiplap, etc.
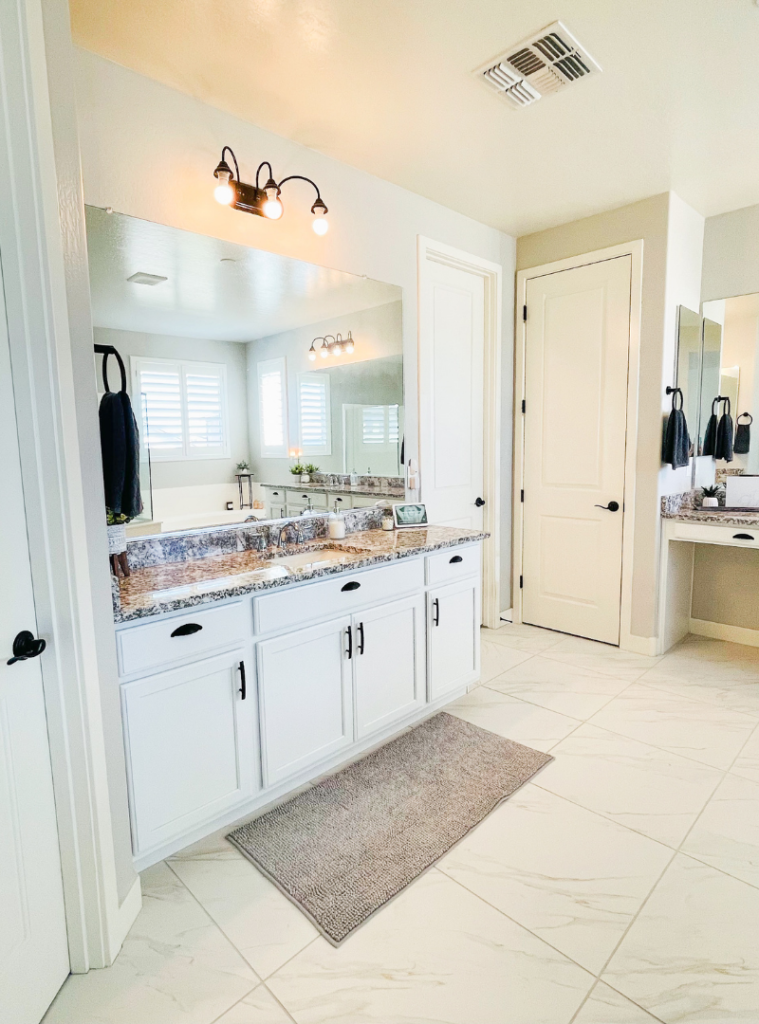
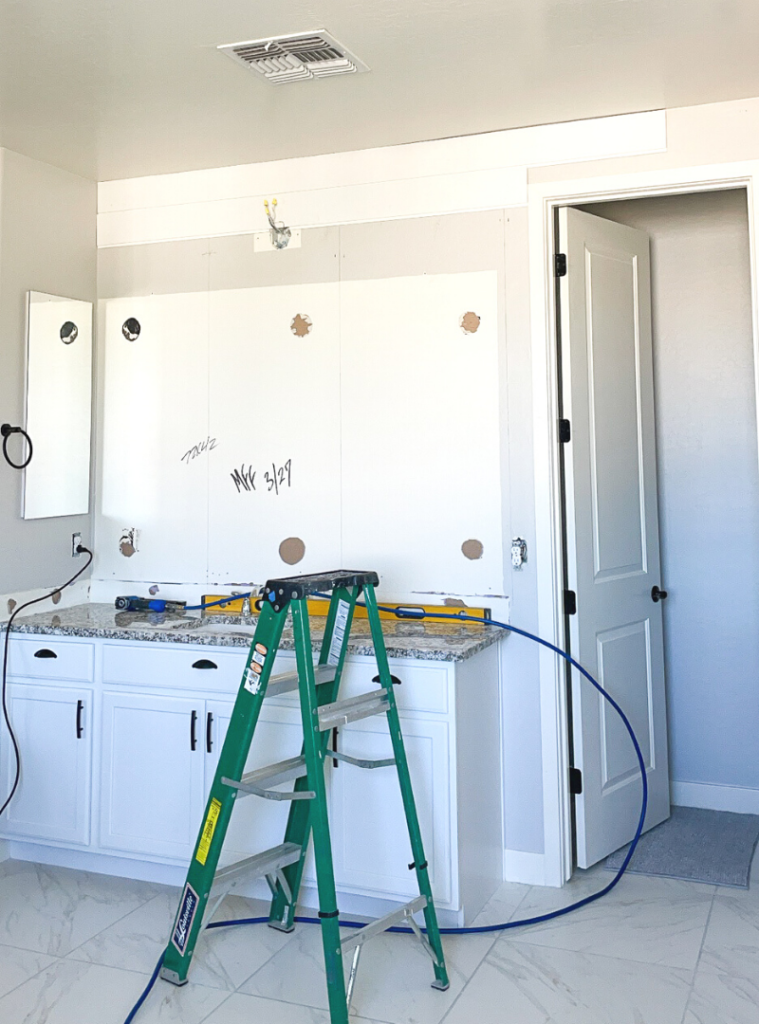
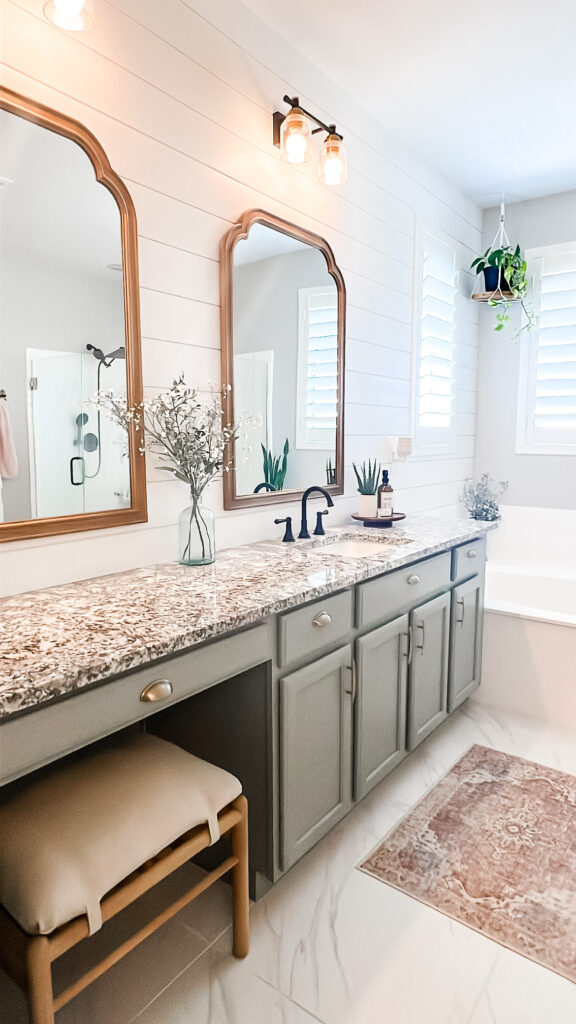
Primary Bathroom Builder Grade-Before
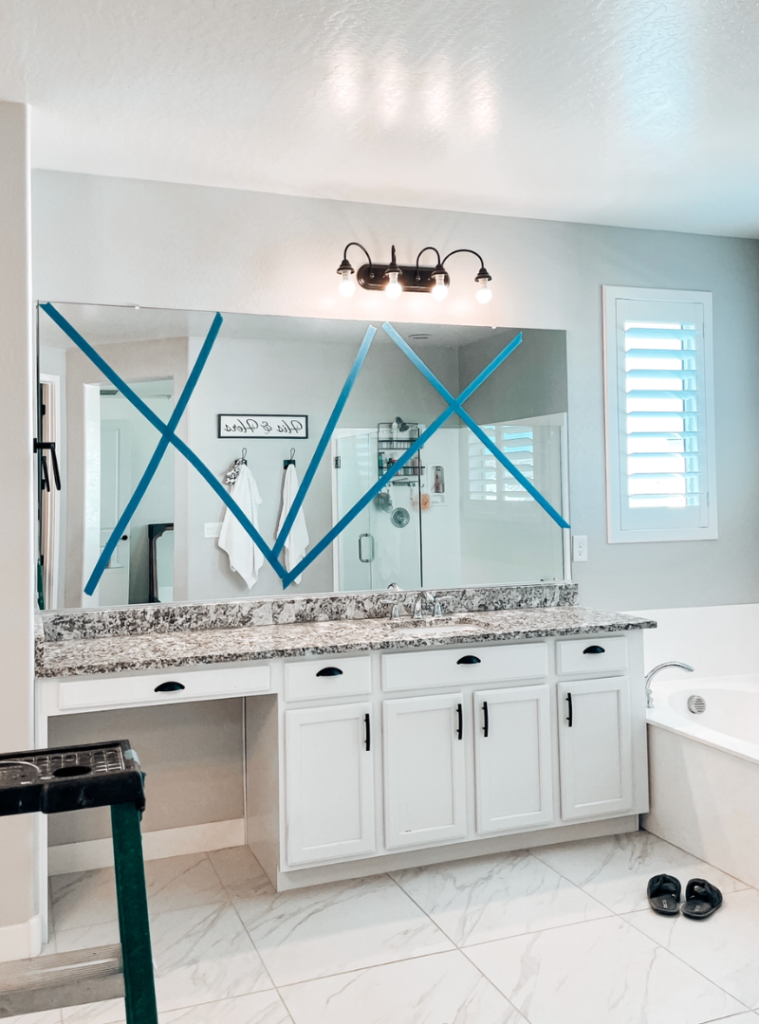
Remove Builder Grade Mirror
The first step will be to remove all of the builder-grade mirrors. I’ve removed a lot of these over the years and never had one break.🤞🏻
But, just to be safe I suggest always adding blue tape to the mirror just in case it does.
We have found the easiest way to remove these types of mirrors is to remove whatever clips are attached, add shims in between the wall and mirror, and hammer down the shims to slowly release the mirror.
Depending on the size of the mirror you’ll be removing, make sure you have enough people to lift and remove it. You’d be surprised at how heavy they can be. 😳
Remove Backsplash
This next step is basically the same as removing the mirrors. You’ll need to remove whatever caulk was applied with a razor blade before you use the shims.
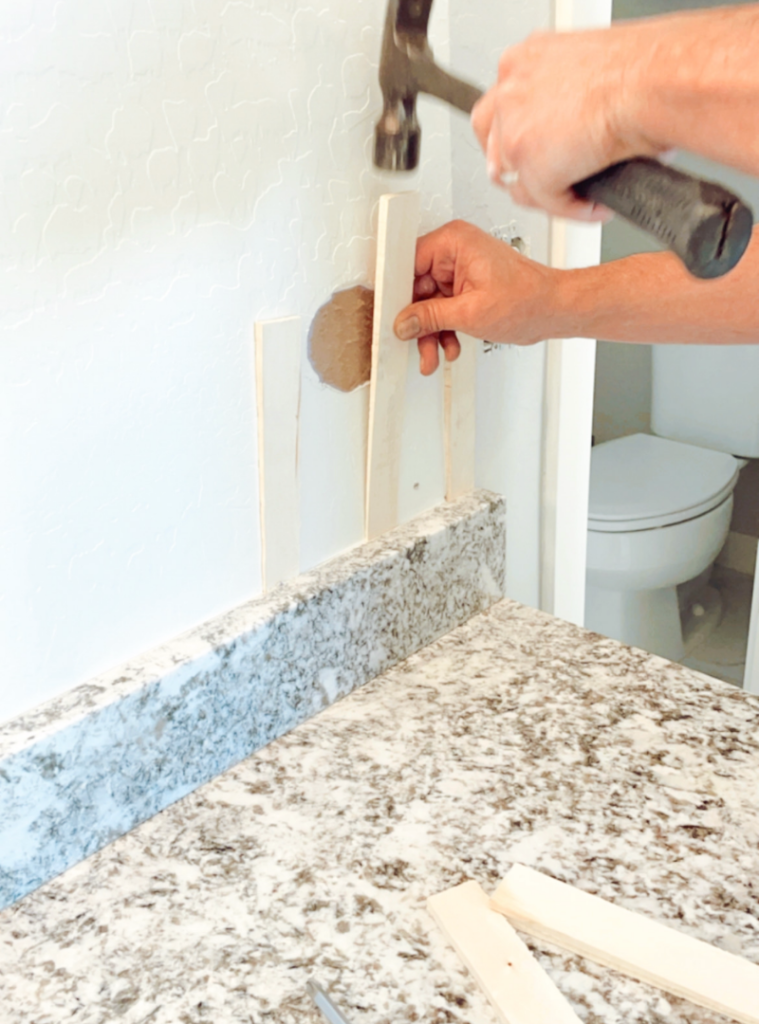
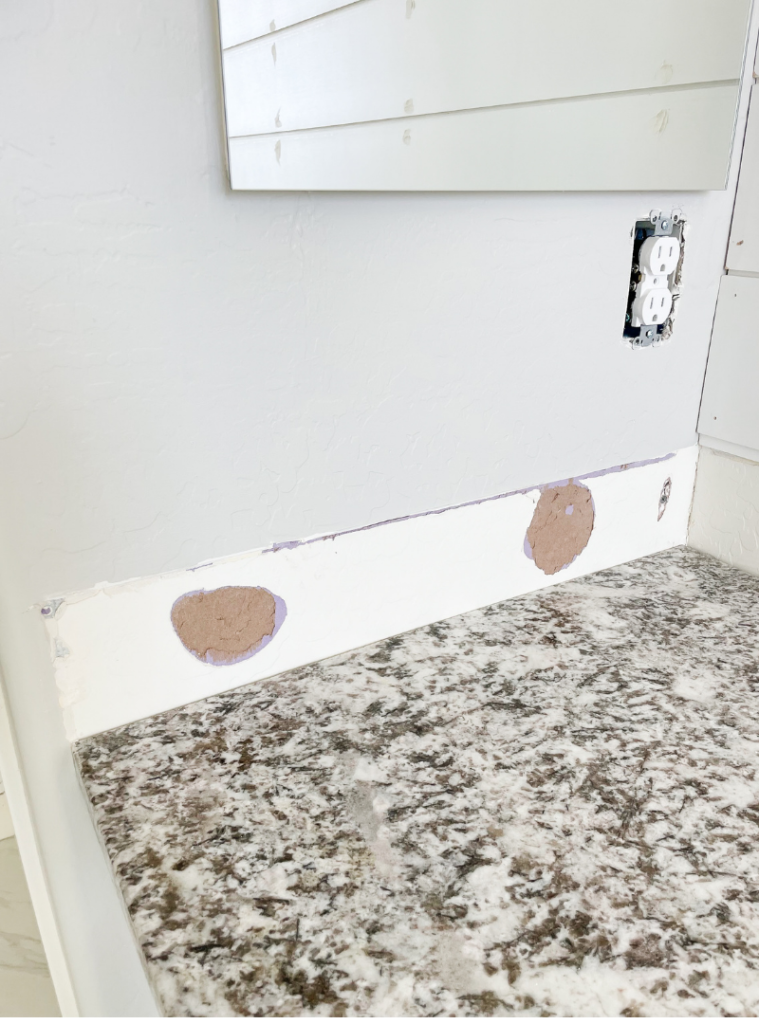
Patch up drywall with All-Purpose Joint Compound
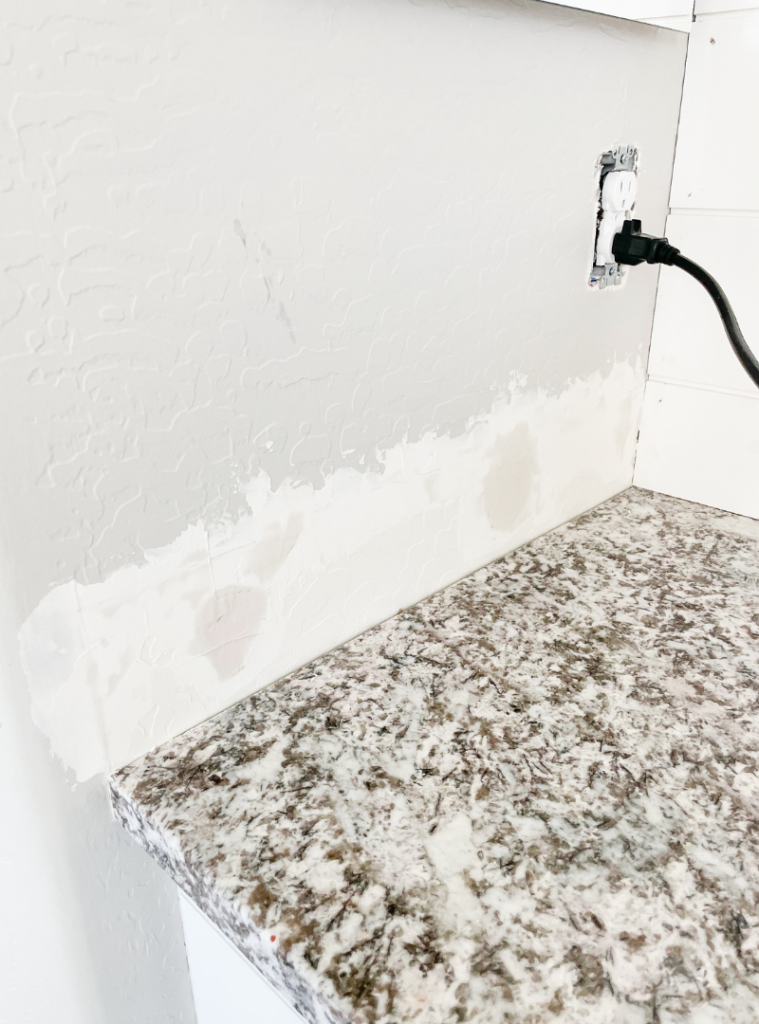
In the next photo, we had to remove some of the sheetrock to run electrical to add a second light over the vanity. I will NEVER understand why the builder didn’t originally have two lights.
To be honest, though I don’t understand anything they do in these houses. 😂
Luckily my husband knows how to do electrical work, so this part we were able to do this ourselves without having to hire someone. 🙌🏻
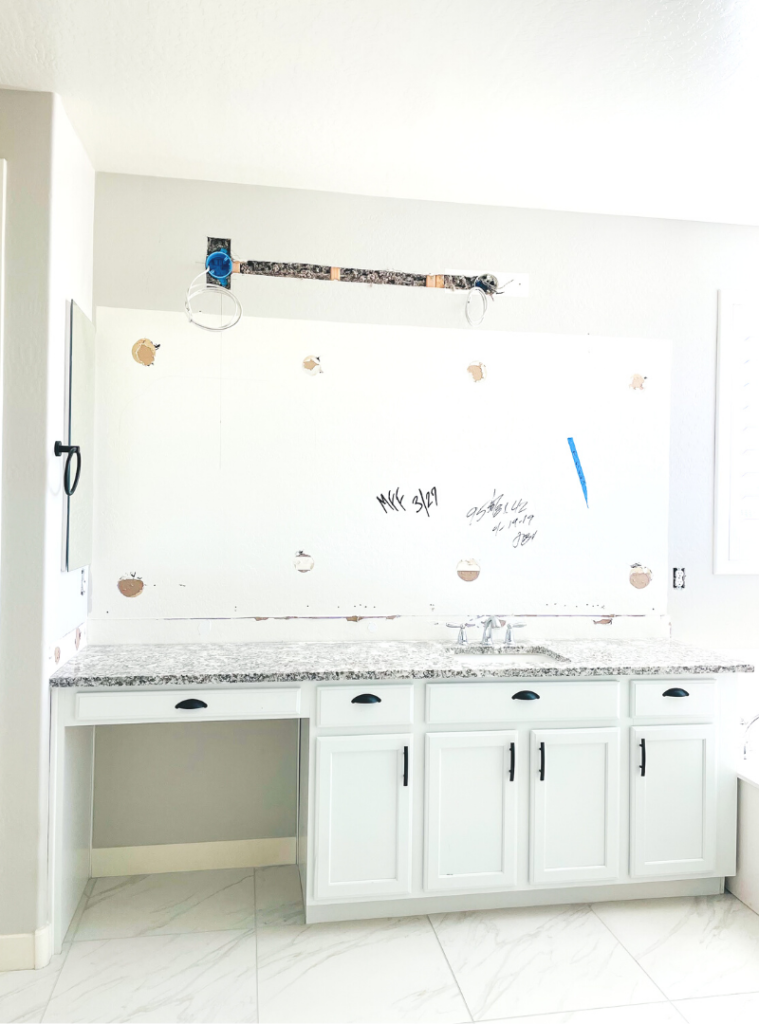
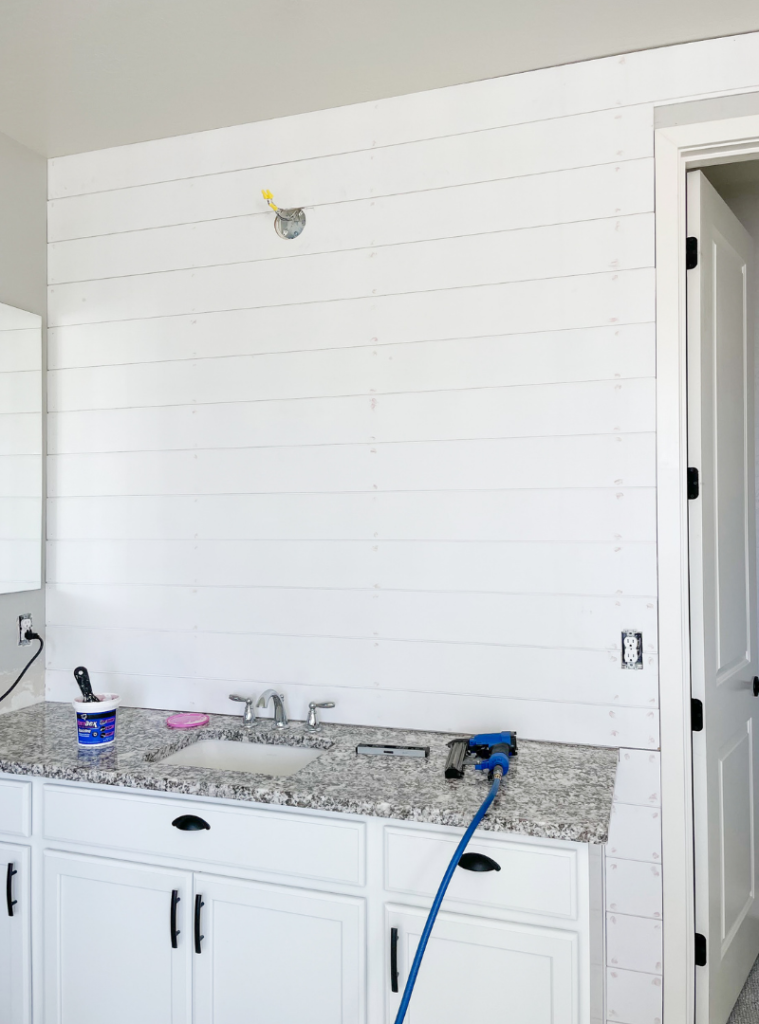
Adding Shiplap Accent Walls
I wanted to add shiplap to the room and thought the vanity walls would look great as the accent walls. The first step is finding where all the studs are and marking them.
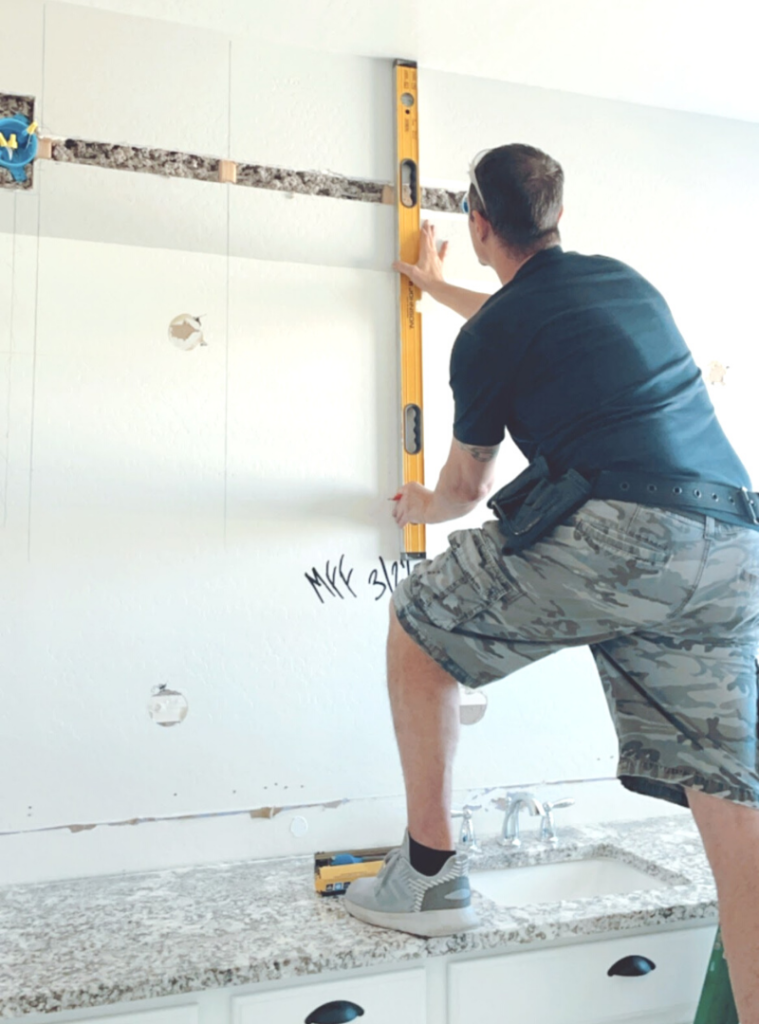
We’ve found starting the shiplap at the ceiling works best. On the very first board, you’ll want to make sure it is 100% level. From there you’ll be good to go the rest of the way down.
Nothing is ever level in these homes, unfortunately. You can clearly see the gap at the ceiling, but the shiplap board is level. That is what is important!
I’m not worried about the gap though, because when I do all the finish work I will caulk the space and you won’t even know it was there.

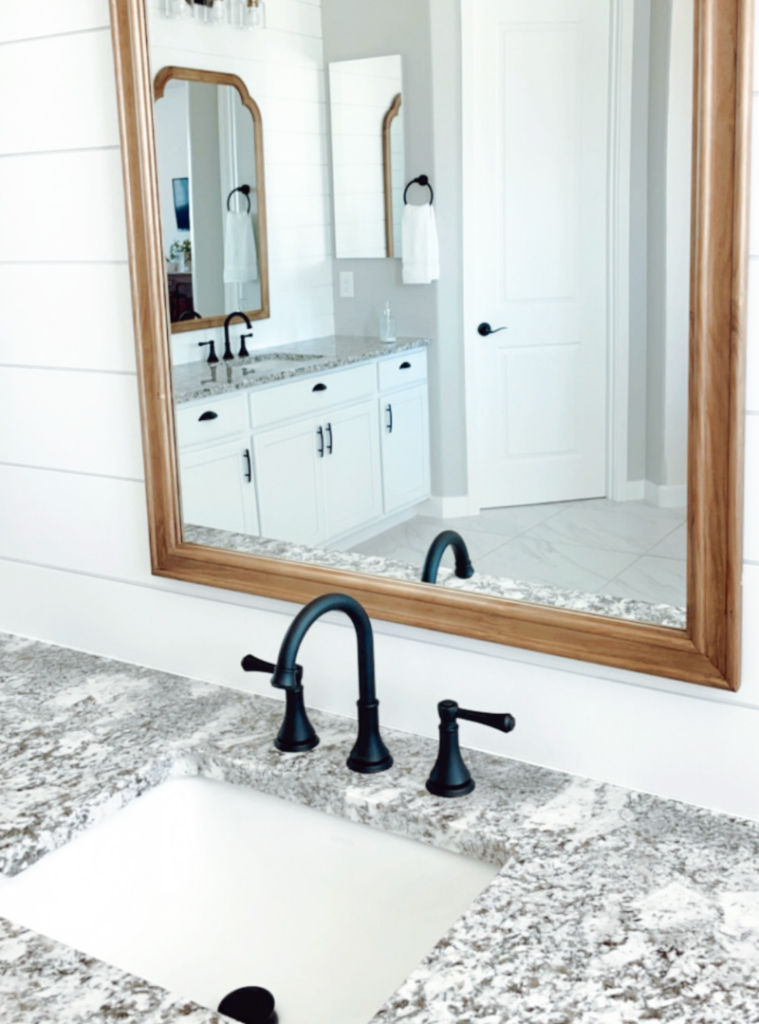
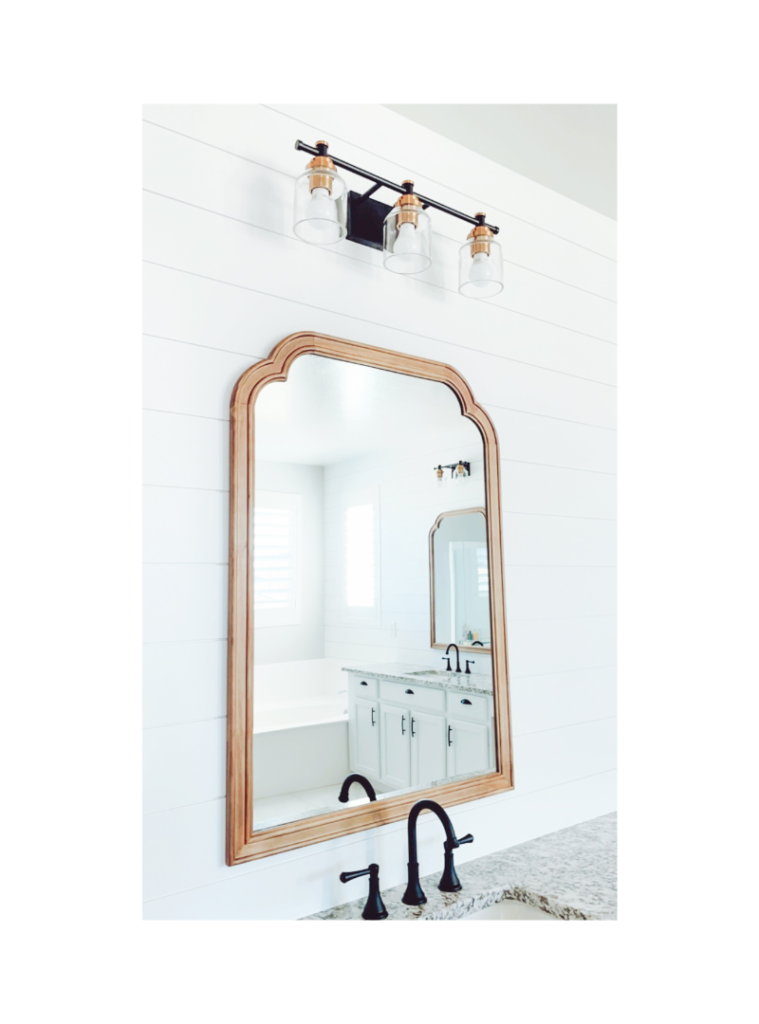
Now for the fun part!! This is my FAVORITE, adding the new mirrors, lighting, and faucets! 😍 This is when the vision starts to come together. Can you tell I’m excited?! 😂
You can find the links to the exact products listed at the bottom of this blog post!
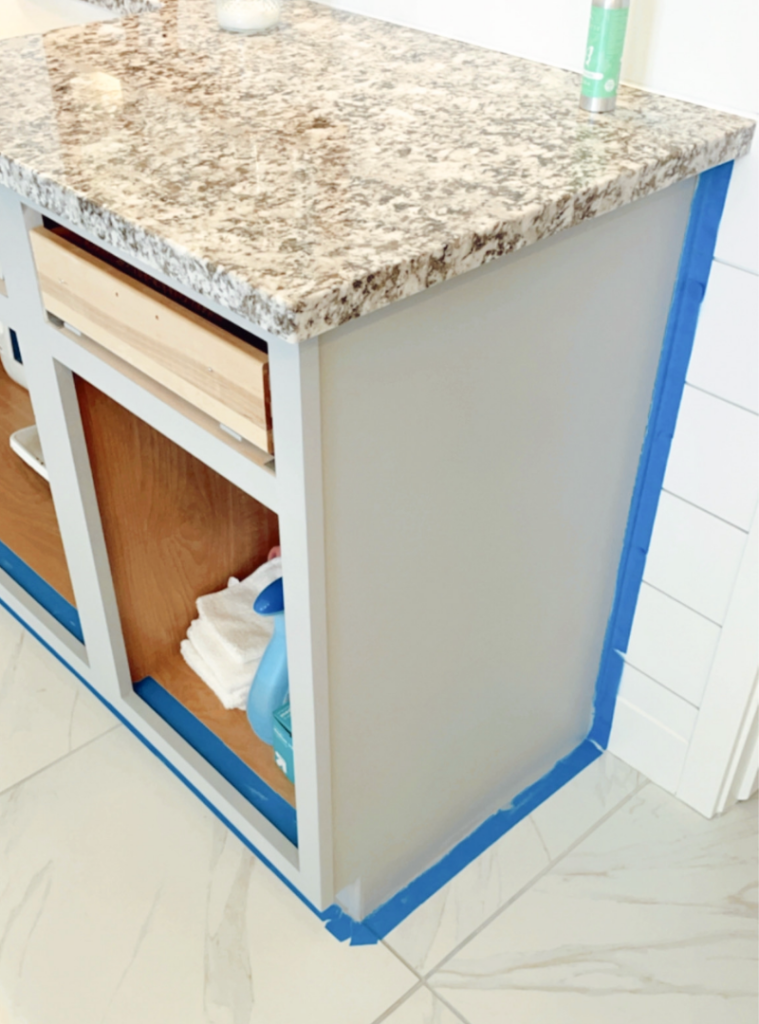
Refinishing and Painting the Bathroom Vanity’s
If you want the REAL scoop on this part…….it’s NOT my favorite. Is it worth it?! Absolutely it is, but it’s a bit of a long process and hurts my body. 😂
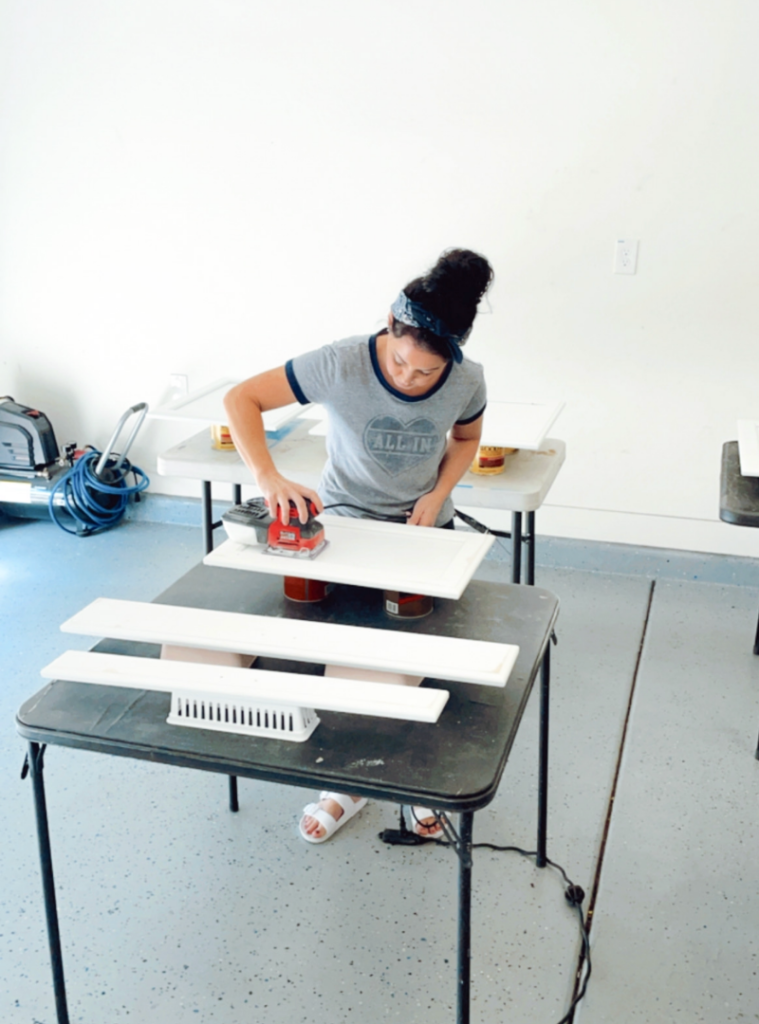
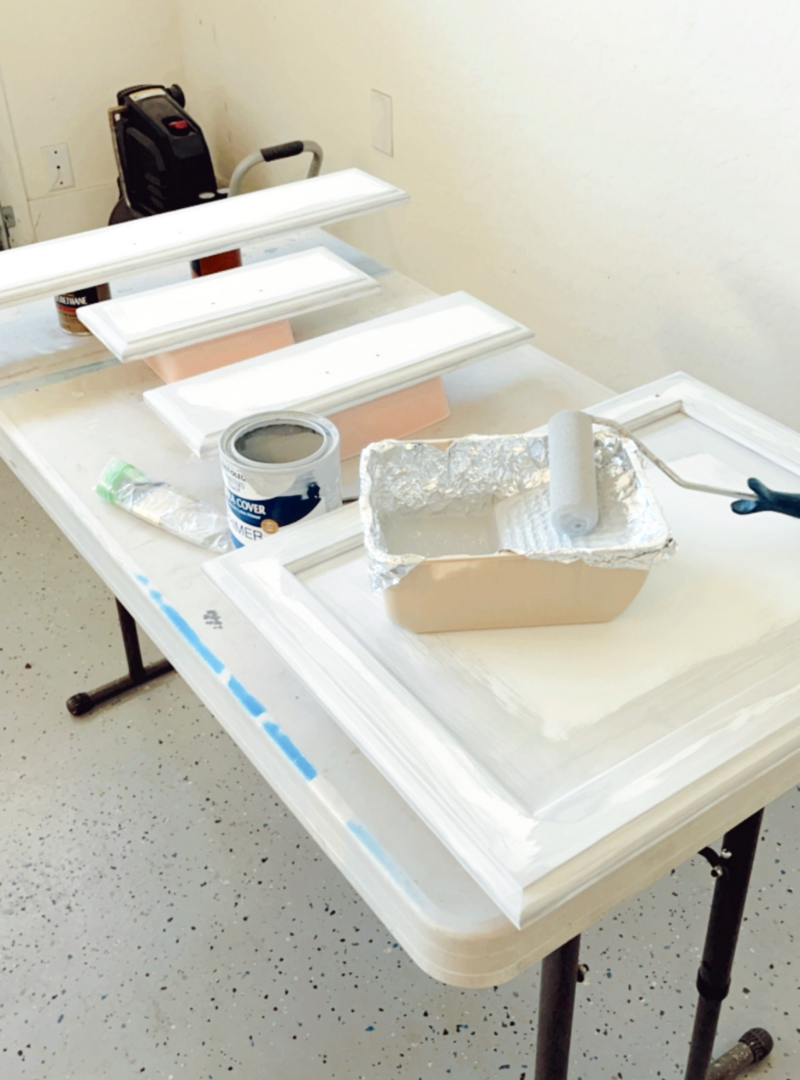
Steps to Refinish Bathroom Vanity’s
- Sand down all cabinets & drawers
- Vacuum off all dust really well, clean off with rubbing alcohol or a damp cloth
- Apply 2 coats of primer
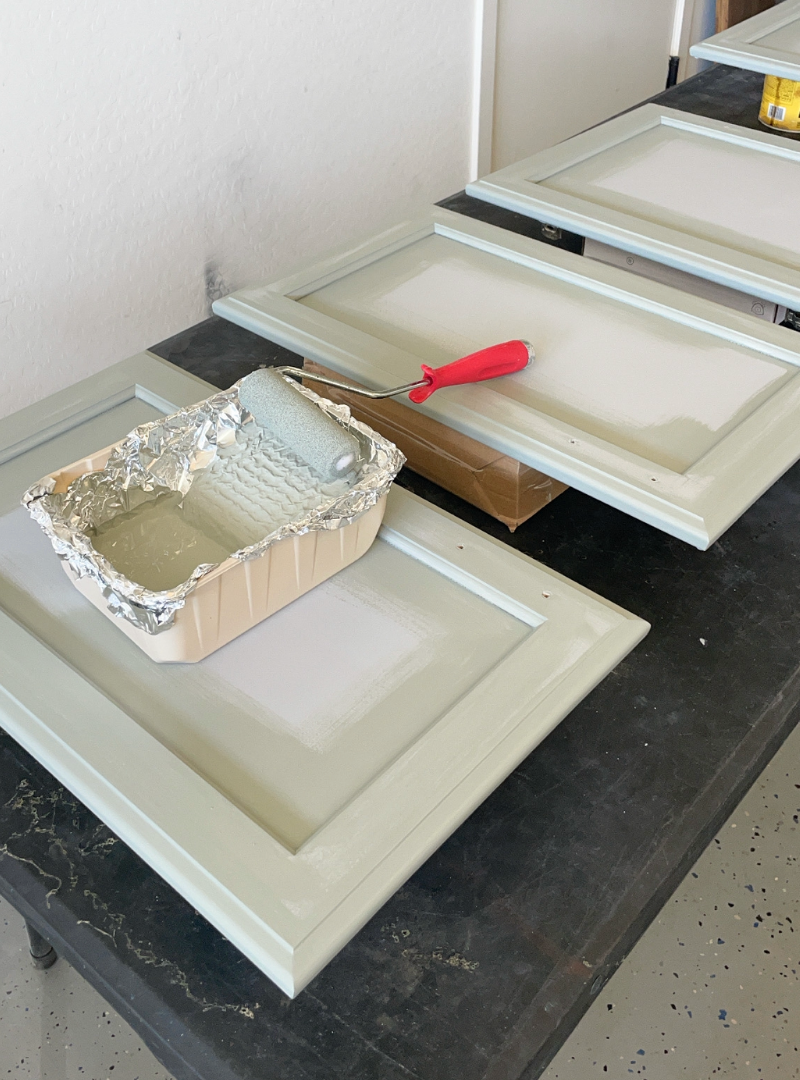
- Apply 2 coats of finish paint
- I apply MiniWax water-based Polycrylic (clear satin) to any areas that I think will see a lot of wear or will be touched a lot.
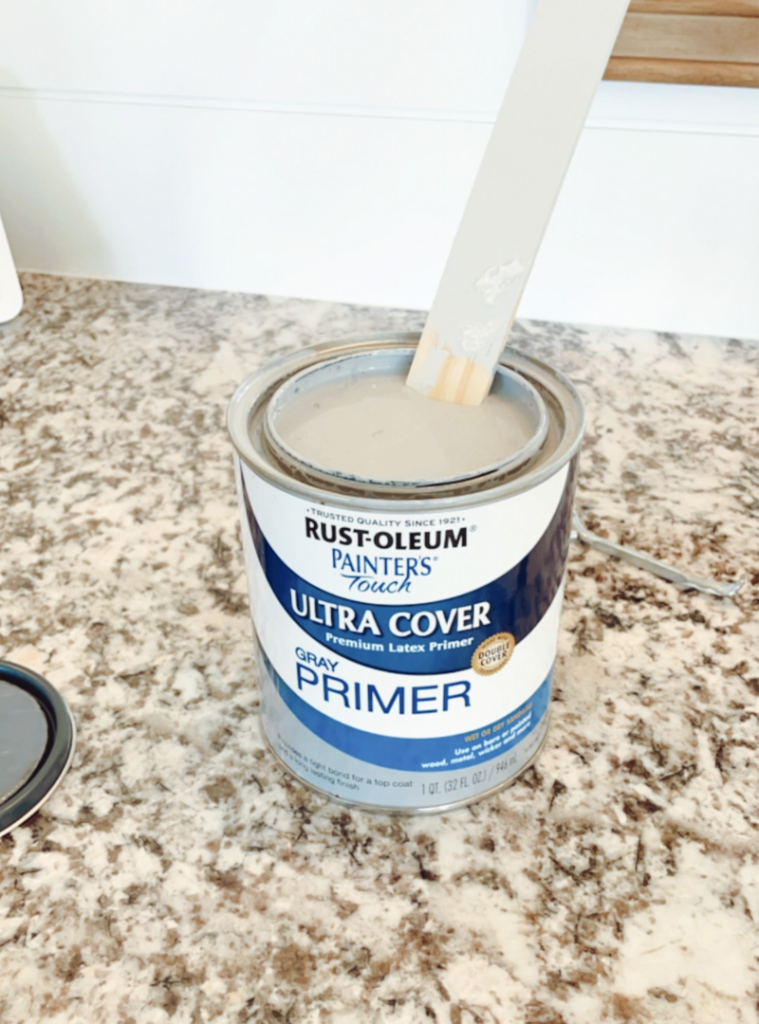
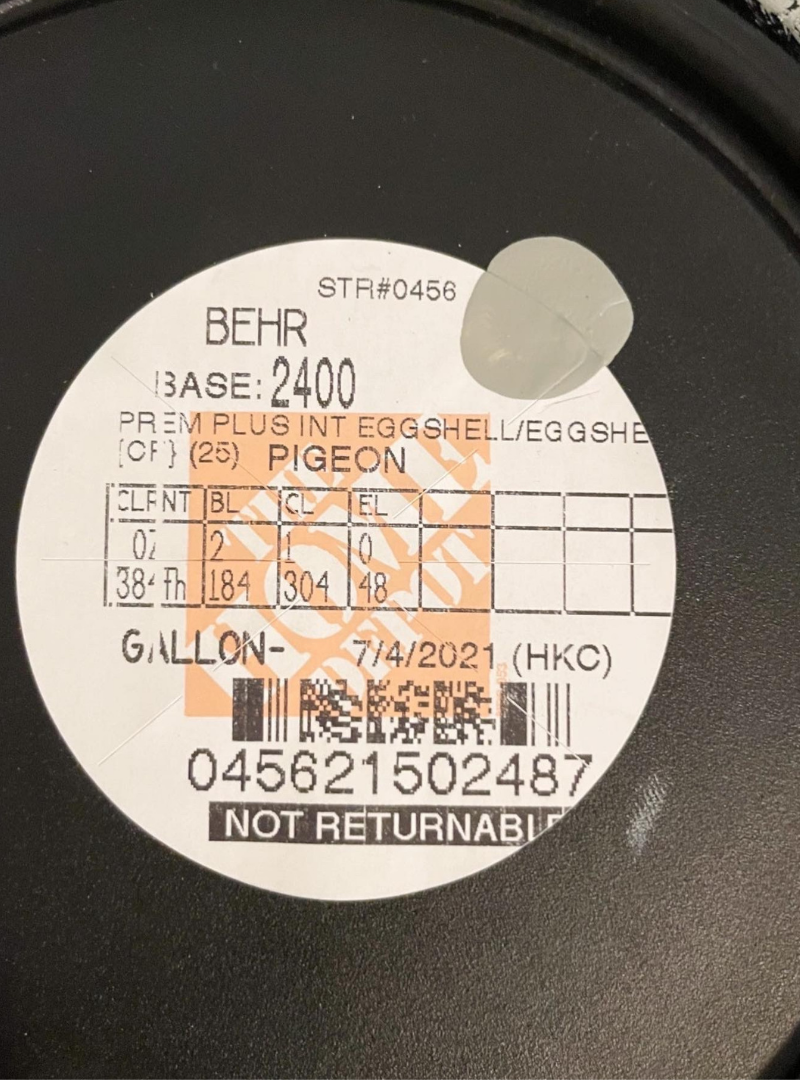
Rust-Oleum Ultra Cover Paint Primer
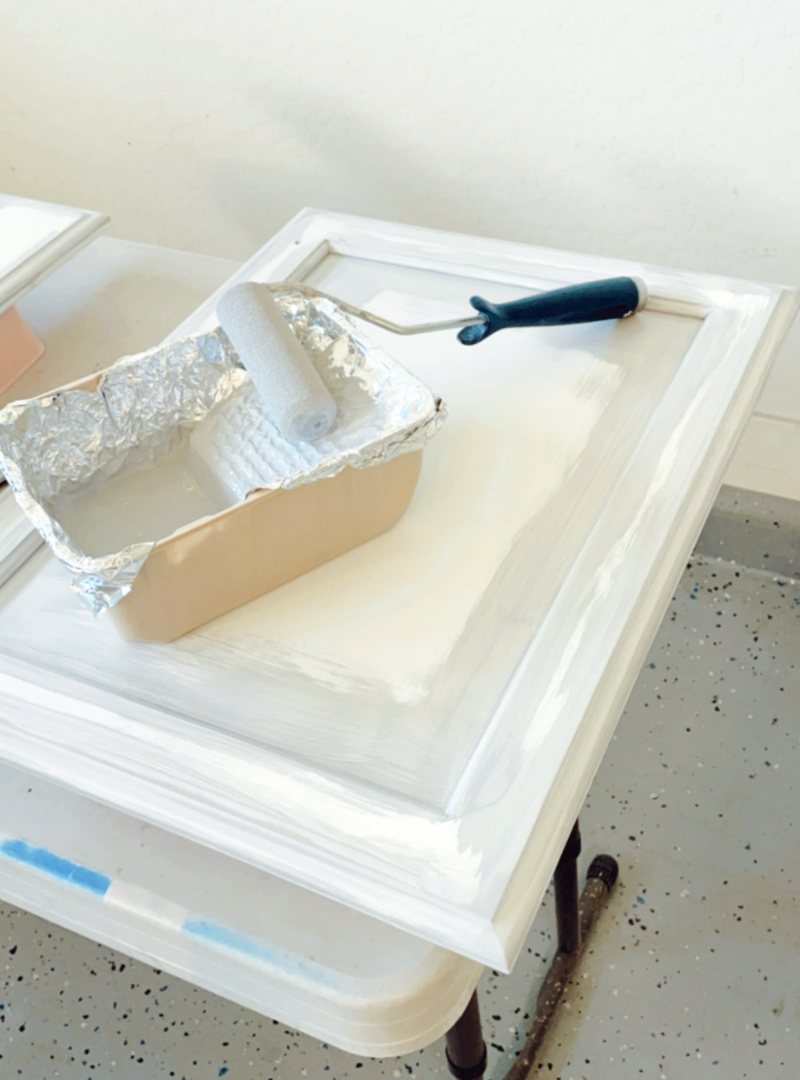
Finish Paint Color (Pigeon)
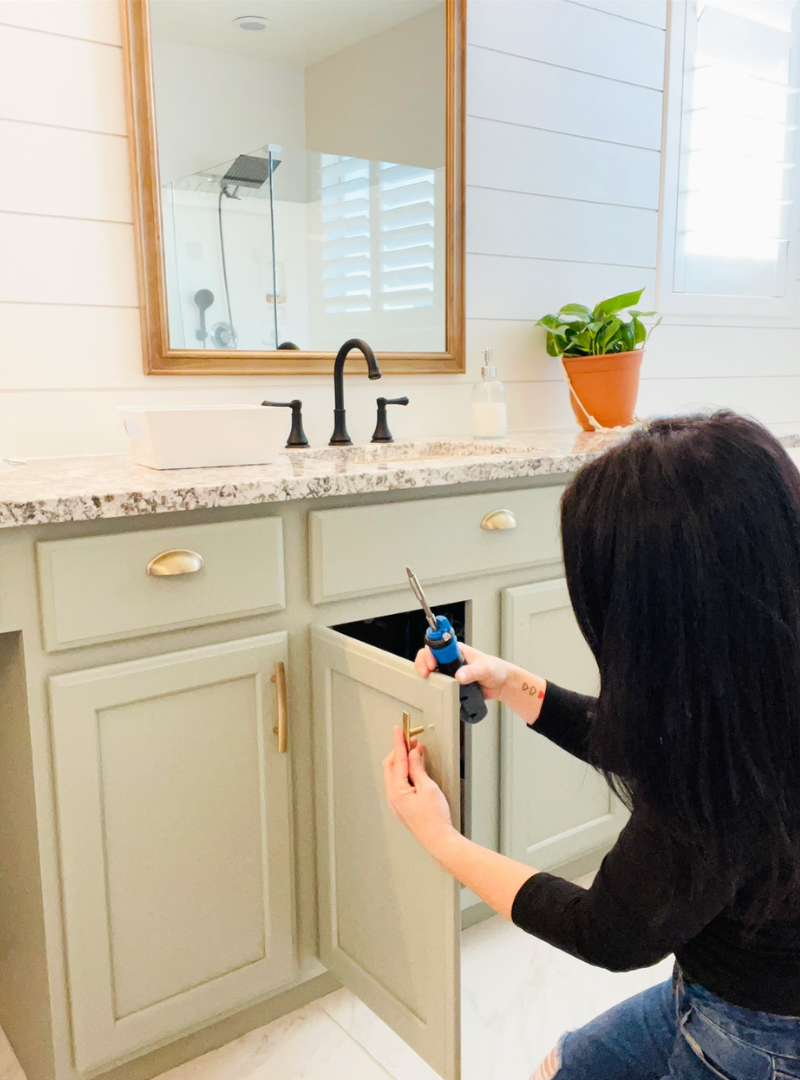
Favorite Bathroom Vanity Cabinet Pulls
I went back and forth over buying new pulls or spray painting the matte black pulls we already had. I purchased a gold spray paint and tested one, but I ultimately couldn’t find the right color.
I found these cabinet pulls at Lowes and immediately knew they were the color I was looking for.
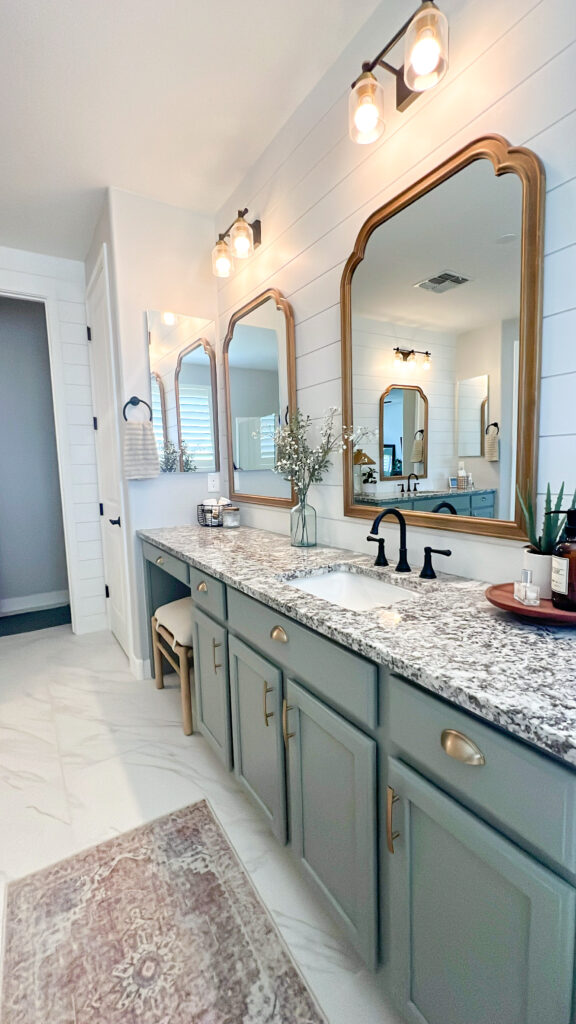
I’m really happy with how this makeover turned out!!
I still have some things to do in the space before it will be finished. Change the rest of the chrome bath & shower faucets, and paint the ceiling the same as the walls (Pure White).
There’s no reason to be stuck with a boring builder-grade bathroom!!
I hope you love this makeover as much as I do and find some inspiration in this post to create a home you love! 💕
Product Sources Linked Here
If you found this blog post helpful I’d love for you to leave a comment and give it a share! You can find me over on the ‘Gram hanging out daily!!
Thanks for stopping by! 💕

If You Liked This Blog Post You May Like
How to Install Interior French Doors to an Existing Opening
How to Pick the Perfect White Wall Paint Color